
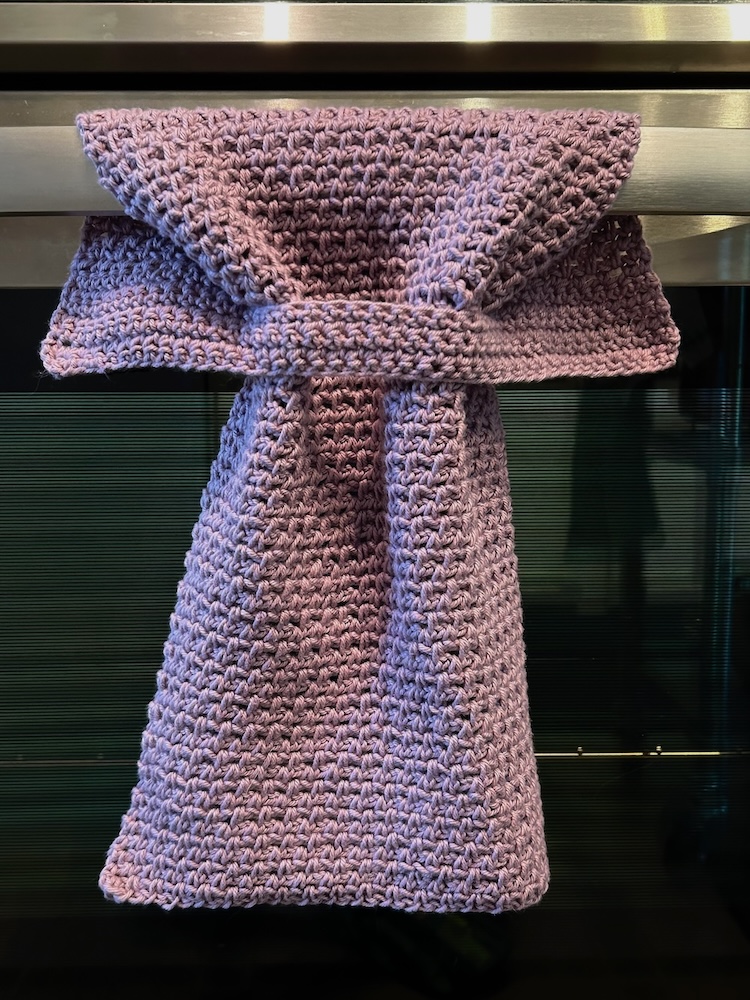
Do you find your kitchen hand towel on the floor more often than not? Maybe it’s just my towel bar, but it seems like every time I go to grab my hand towel, it has slipped to the floor. And, that’s just gross! So, I grabbed my hook and decided to crochet a hand towel that “stays put”!
This is definitely a beginner friendly pattern, so if you know how to chain and single crochet you can make this hand towel!
Supplies needed:
- Worsted weight (#4) cotton yarn, 100 g – I used Dishie from Knit Picks, but any cotton yarn will work.
- H (5.0mm) crochet hook
- scissors
- darning needle
A few notes:
- This towel is fully customizable. You can adjust either the width or length, or both. For a different width towel, increase or decrease the foundation chain in multiples of 2, keeping an odd number of total chains. For a longer or shorter towel, adjust the number of repeats.
- The body of the towel uses the linen stitch, which tends to stretch lengthwise, especially with use. It will also draw in a bit as it stretches. Keep this in mind when deciding on the length of your towel.
- The top of the towel is worked in single crochet stitches, which will not draw in like the linen stitch portion. This is okay and does not affect the way the towel hangs at all. Just something to keep in mind as you are working.
- If you have a thick towel bar, you can increase the number of rows in the top section to allow more space to wrap around your towel bar.
- Links to the downloadable (free) written pattern and video tutorials for both left and right handed crocheters are at the bottom of the page!
Let’s get started!
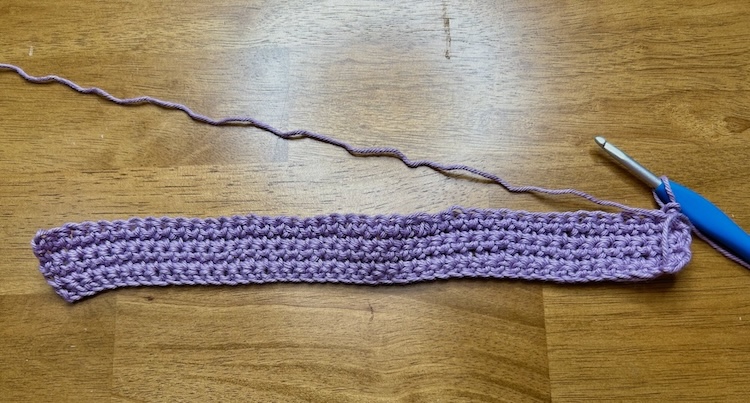
Start with a slip knot and loop on your hook. Chain 45 for the foundation chain.
Row 1: Single crochet in the second chain from the hook and in each chain across, giving you 44 stitches.
Rows 2 – 5: turn and chain 1. Single crochet in each stitch across, making sure you keep 44 stitches. (if you need a wider top portion to accommodate a thick towel bar, do more repeats of this row)
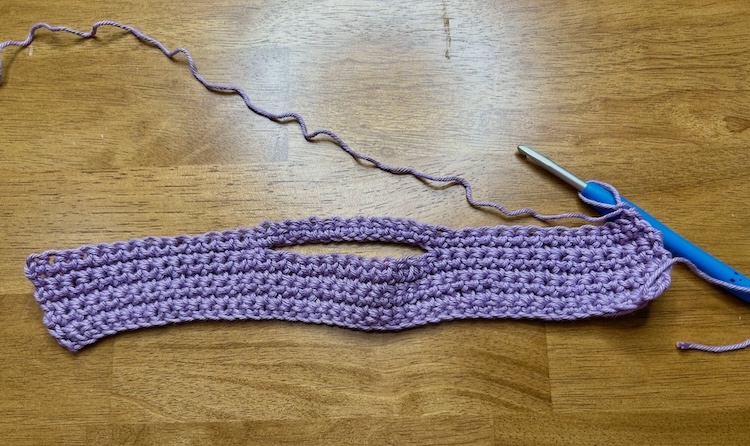
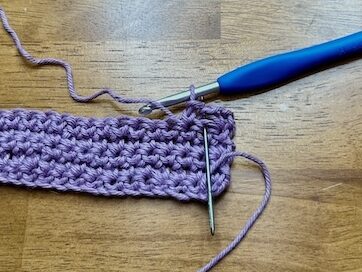
Row 6: turn and chain 1. Single crochet in the first 15 stitches. Chain 14 and skip 14 stitches. Single crochet in the last 15 stitches. You have 30 stitches and d14 chains.
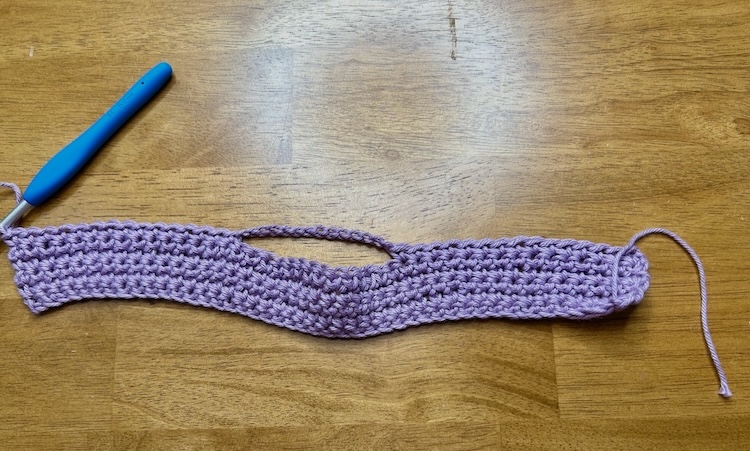
Row 7: turn and chain 1. Single crochet in the first 15 stitches. Single crochet in each of the 14 chains. Single crochet in the last 15 stitches, giving you 44 stitches again. When crocheting into the chains, be consistent so you do not twist the chain. It can be a little tricky, so make sure you count your stitches!
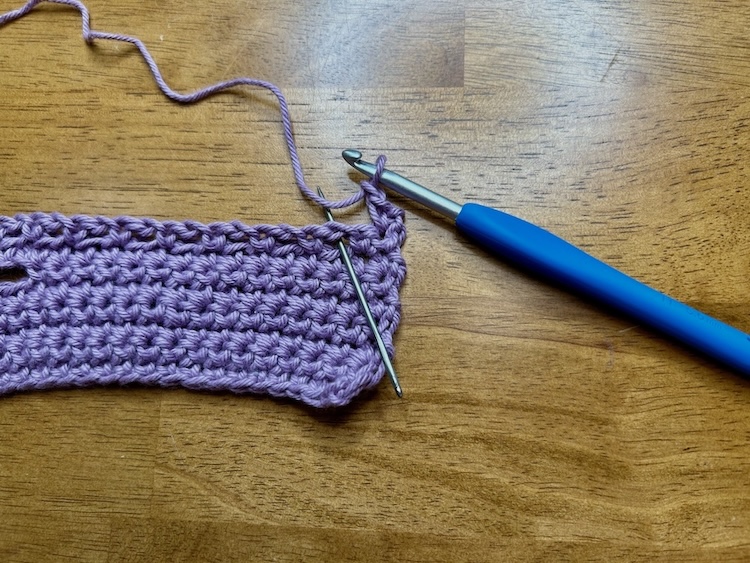
Row 8: (this row sets up the linen stitch) turn and chain 1. Single crochet in the first stitch and chain 1. Skip the next stitch and single crochet in the following stitch then chain 1. Continue across the row, skipping a stitch and then single crochet/chain 1 in the following stitch until you reach the last 3 stitches. Single crochet in the last 2 stitches to finish the row. You will have 23 stitches and 21 chain 1 spaces.
Row 9: turn and chain 1. Single crochet in the first stitch and chain 1. Skip the next stitch and single crochet in the chain 1 space from the previous row. Chain 1 and continue across the row, working single crochets in the chain 1 spaces followed by a chain 1 until you reach the last chain 1 space. Single crochet in the last space, but do not chain 1 after this stitch. Single crochet in the last stitch so that you have two single crochet stitches right next to each other.
Repeat row 9 for 67 rows, or until your towel reaches the desired length.
When you’ve reached the desired length, cut your yarn and tie off. Then weave in the ends. For the linen stitch, I like to alternate rows in a kind of zig-zag to weave in my ends. Otherwise, the spaces in the linen stitch leave things a little too loose and you can see the yarn ends.
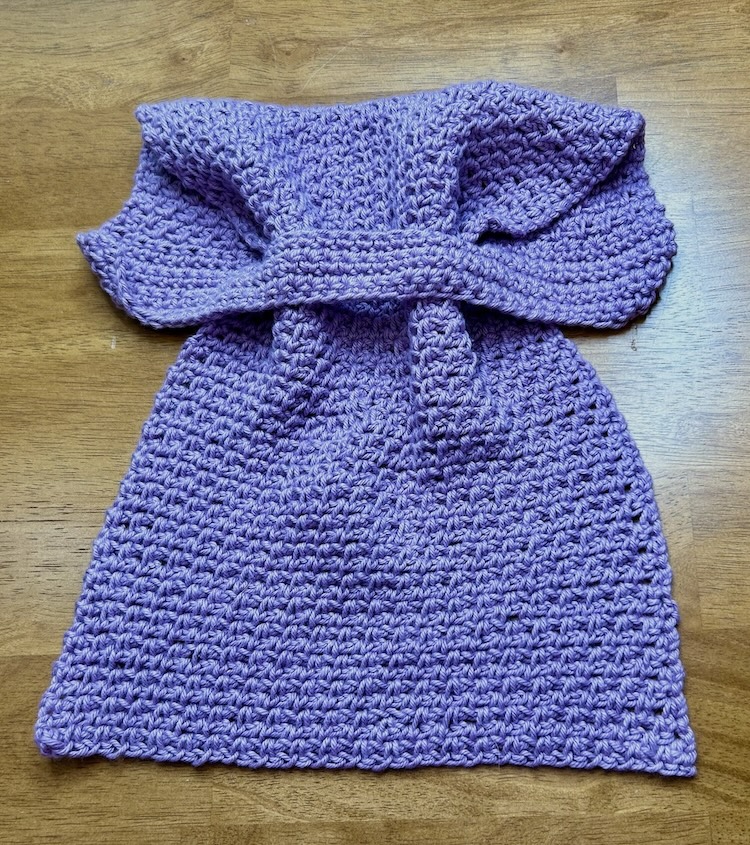
To hang the towel, place the loop end to the back of the towel bar and slide the body of the towel through the loop. Voila! Your crocheted hand towel will “stay put” right where you placed it!
Download a printable PDF version
Video Tutorials

Buy me some Yarn?
If you are enjoying the content I've created and would like to support with a tip, you've found the right place. Any amount is greatly appreciated!