I’m a bit of a Christmas elf. Okay, maybe more than a bit. I have been compared to Buddy the Elf before. It’s my favorite holiday for many reasons – the decorations, the baking, the lights. But most of all, I love the generosity and good will that comes with Christmastime. And with a spirit of generosity, I have a little gift for you – a crocheted Christmas Star Ornament! Complete with full step by step instructions, a video tutorial and a downloadable, printer friendly PDF (scroll to the bottom for video and PDF links). These are quick and easy (and a little addictive), so they are perfect for last-minute gifts!
To make your very own crocheted Christmas Star Ornament, you will need:
- #3 cotton crochet thread, approx 3 grams (I used Aunt Lydia’s Fashion 3 in white)
- D/3.25 mm crochet hook
- scissors
- needle
- blocking mat
- no-rust blocking pins
- blocking medium, such as liquid starch or a glue/water mixture
How to crochet the Christmas Star Ornament
We’re going to start off with a magic circle. Once you’ve made the magic circle, chain 3, which counts as a double crochet and a chain 1. Continue working in the magic circle, making 7 more double crochet, chain 1 pairs. Join with a slip stitch to the second chain of your beginning chain 3. You should have 8 double crochets and 8 chain 1 spaces, remembering to count the initial chain 3 as a double crochet and chain 1.
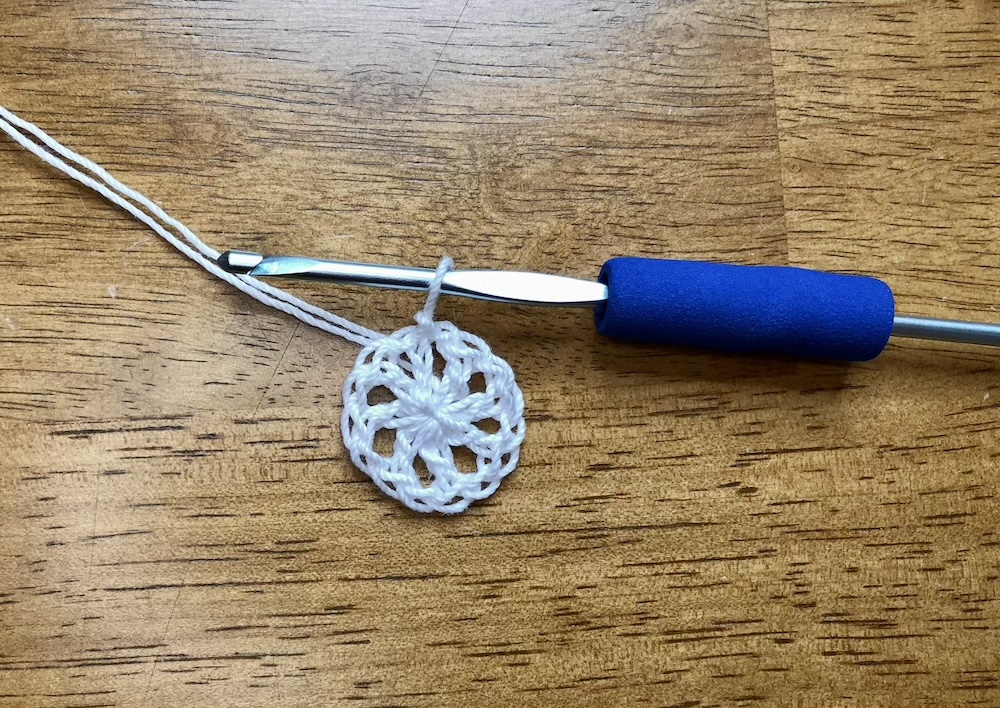
If you need help with the magic circle, check out my tutorial (left or right handed!). The tutorial shows working single crochet stitches, but the process is the same for the double crochets we are using here.
Round 2
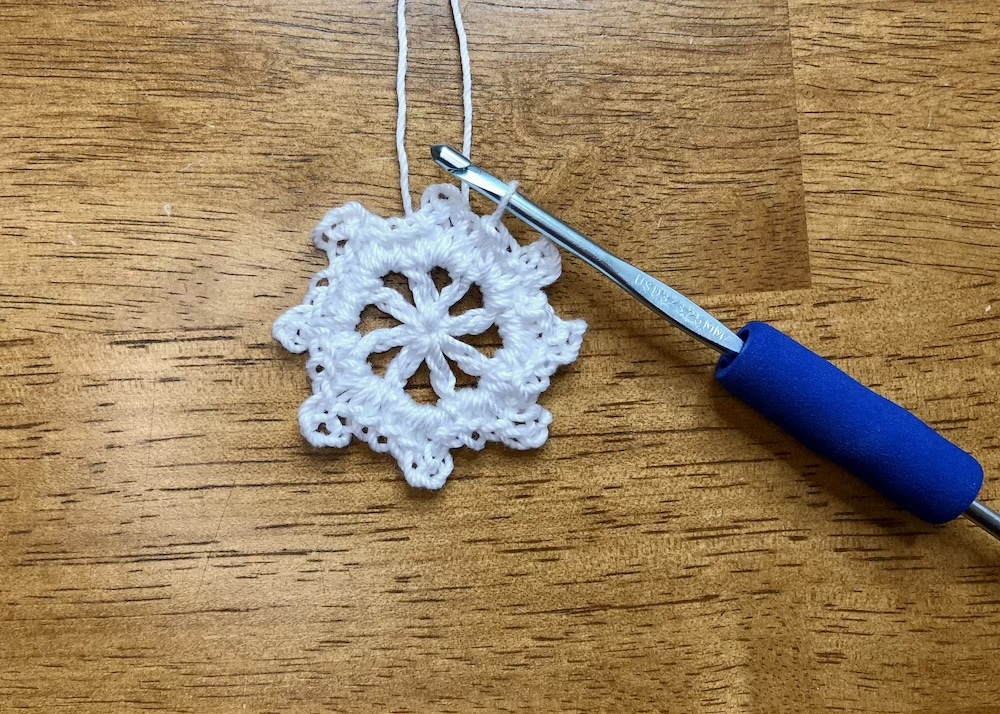
For the second round, we are going to work into the chain 1 spaces from the first round. You will skip all of the double crochet stitches between the spaces and only work in the spaces as you go around. There will be a total of 4 stitches in each chain 1 space, so it can get a little tight, but watch carefully that you are working in the space and you will be fine. In each chain 1 space, work 2 single crochet stitches, then chain 3, and finish with 2 more single crochet stitches in that same space. Do this in each chain 1 space around, then join with a slip stitch to the first single crochet. Each of these chain 3 spaces becomes the base of one of the points of the star. You should have a total of 32 stitches and 8 chain 3 spaces.
Round 3
In round 3, we start to differentiate between the different point sizes. We will be working mainly in the chain 3 spaces, with just one stitch worked in between the points. There There are 2 different combinations we will work in the spaces, and we will alternate these combinations going around.
To get started, skip the first 2 single crochets to get to the chain 3 space. In this space, work 1 single crochet, 1 half double crochet, 1 double crochet, chain 3, 1 double crochet, 1 half double crochet and 1 single crochet.
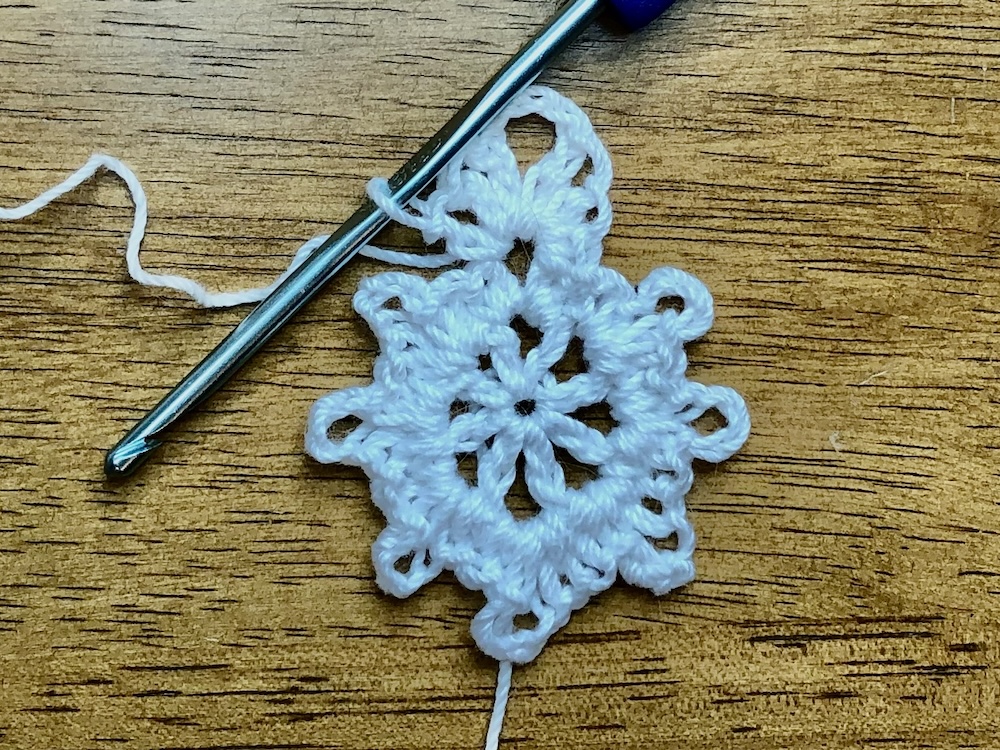
Next, we will skip 2 stitches, then work a single crochet in the 3rd stitch from the previous round. Look carefully for the first skipped stitch as it often gets lost under the stitches in the chain 3 space. The single crochet you are working anchors the point of the star and should end up being in the middle of the stitches. Sometimes I find it easier to eyeball the location rather than count the stitches. The pin in the first image below shows the location of the single crochet and the second image shows the completed stitch.
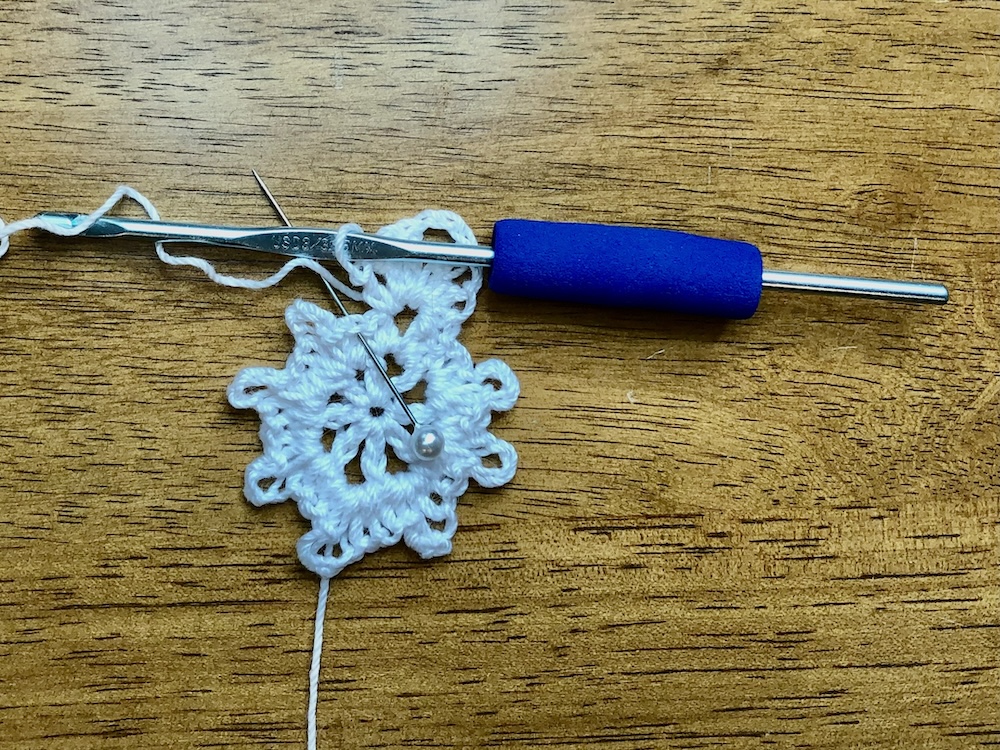
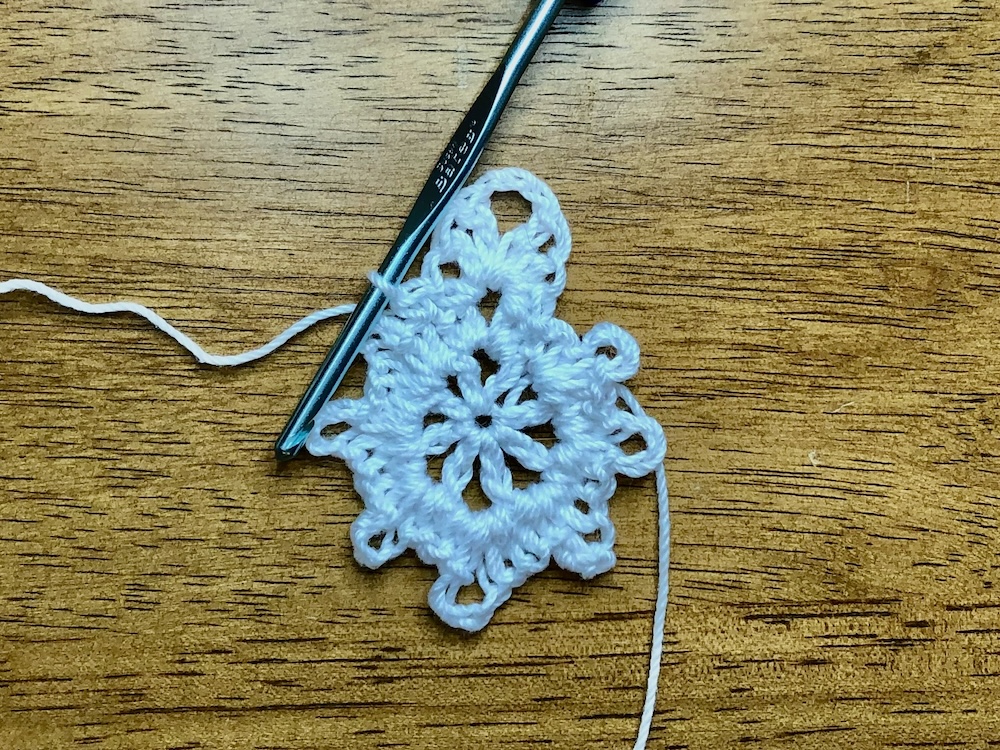
Moving on, we will skip the next two stitches to get to the chain 3 space. In this space, work 2 single crochet stitches, chain 3 then work 2 more single crochet stitches. Skip two stitches like above and work a single crochet in the 3rd stitch to anchor the point.
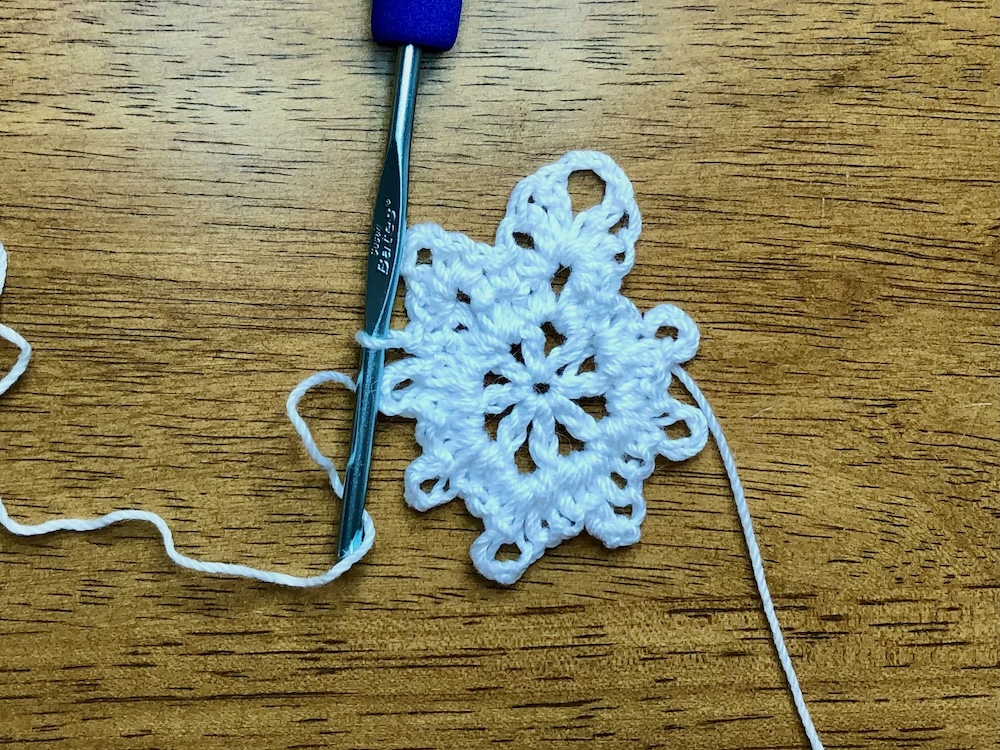
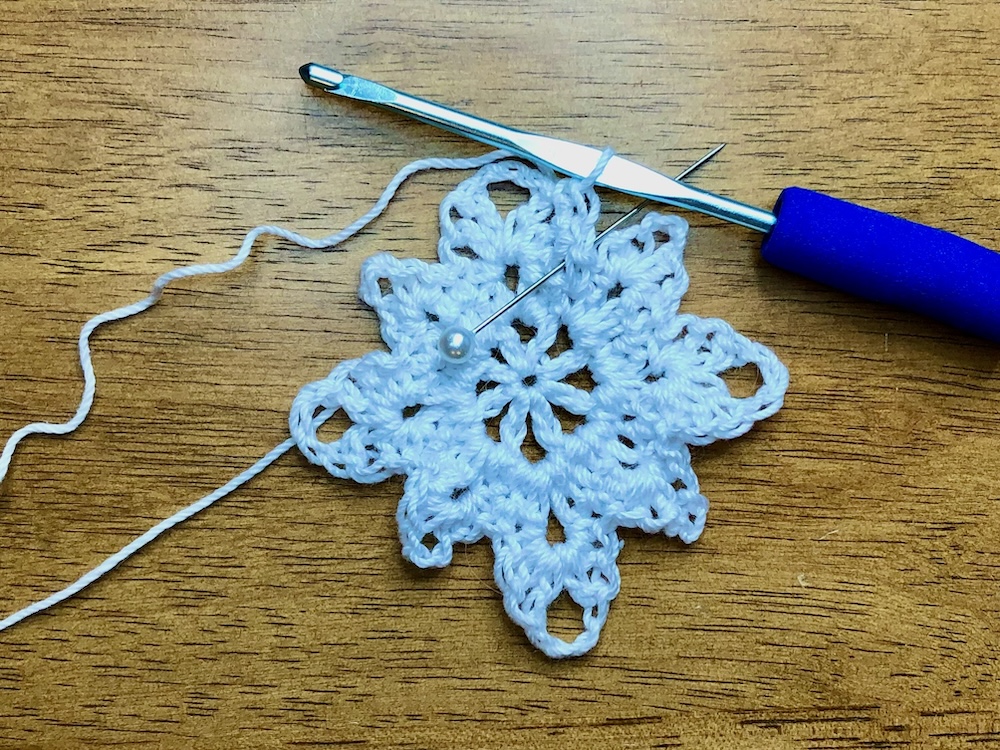
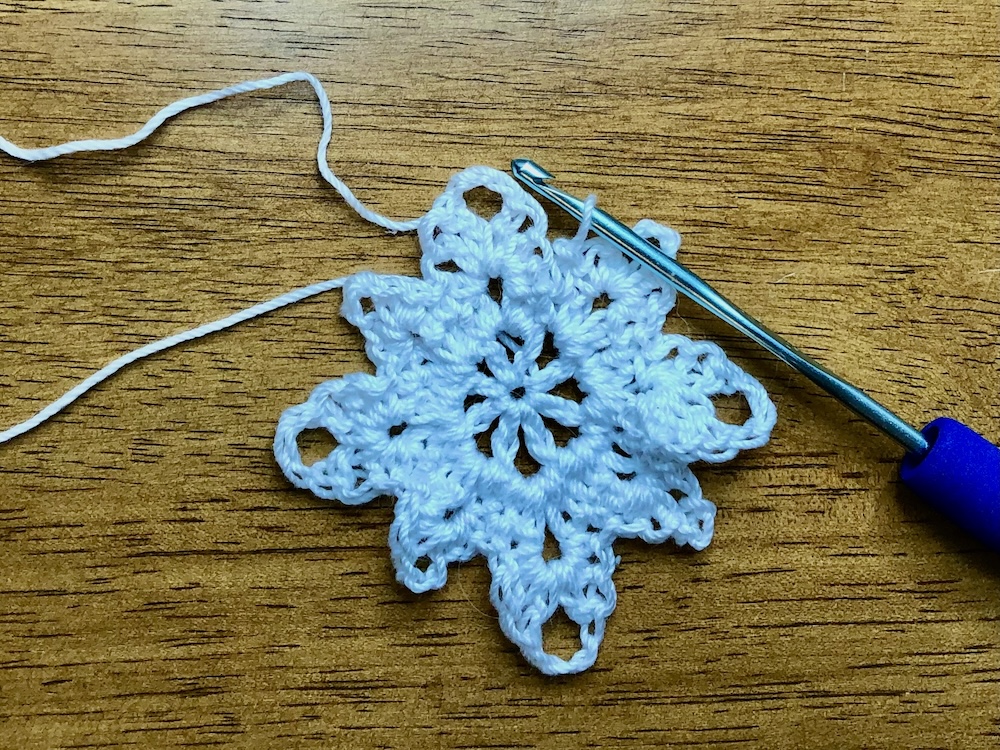
To finish round 3, just alternate these two stitch combinations in the chain 3 spaces around your star. When you reach the beginning, work the final single crochet in the same place as the join in round 2. In the photos below, the pin shows the final stitch location and the second photo shows the finished round. Do not join to finish this round. You can see that we have 8 points to our star – 4 large and 4 small, with a total of 48 stitches and 8 chain 3 spaces.
Round 4
A quick note about round 4 before we get started. We will be skipping some stitches, similar to round 3. Look carefully to find the skipped stitches, especially when the skipped stitch is after a chain 3 space. Another helpful reminder – when approaching a chain 3 space, you will always be working in the last 2 stitches before the space. If you find yourself working in different stitches, you’ve gotten off somewhere and need to backtrack.
Let’s get to the final round! Skip 1 stitch and then single crochet in the next two stitches to get to the chain 3 space. In the first chain 3 space, work 1 half double crochet, 1 double crochet, chain 2, 1 double crochet and 1 half double crochet. Skip 1 stitch, then work 1 single crochet in each of the next 2 stitches. Skip the next stitch, then work 1 single crochet in each of the next 2 stitches. In the first photo below, the pin indicates the first skipped stitch and the second photo shows the completed single crochets with the pin indicating the second skipped stitch.
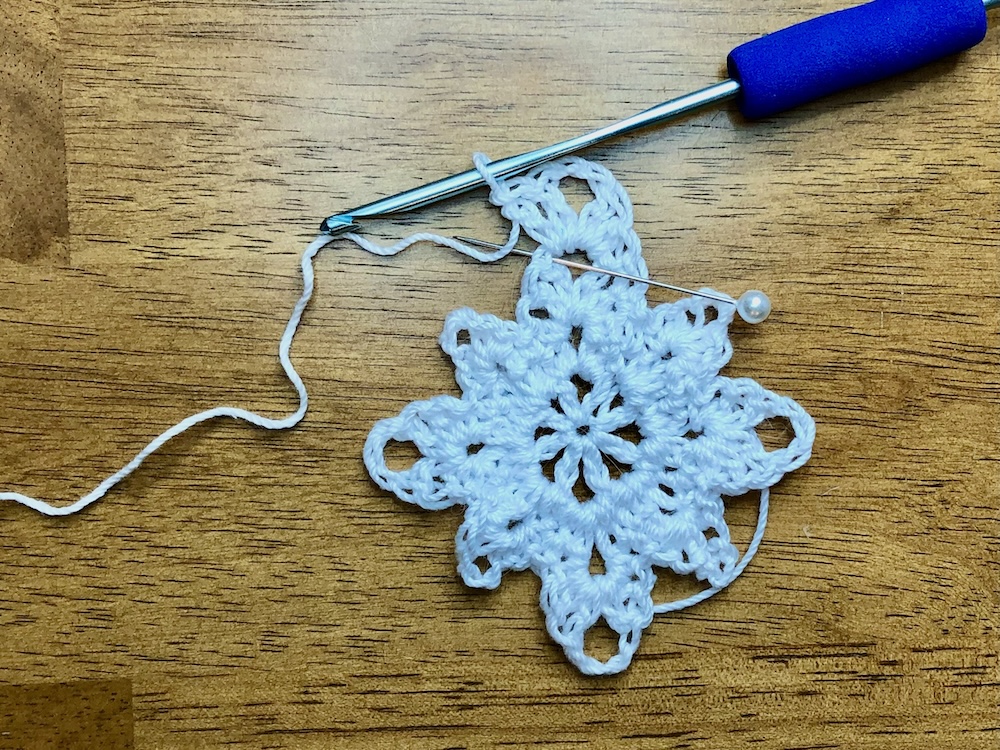
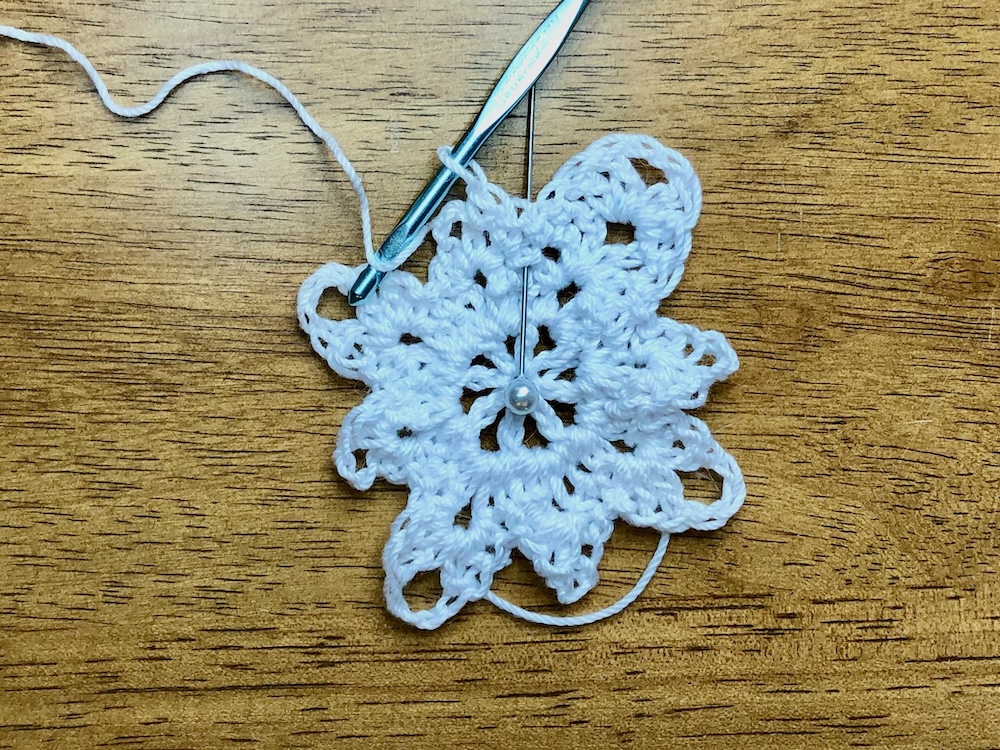
Now we are to the second chain 3 space. This is one of the smallest points on the star, so we will be using small stitches! Work 1 slip stitch, chain 2 and one more slip stitch in the space.
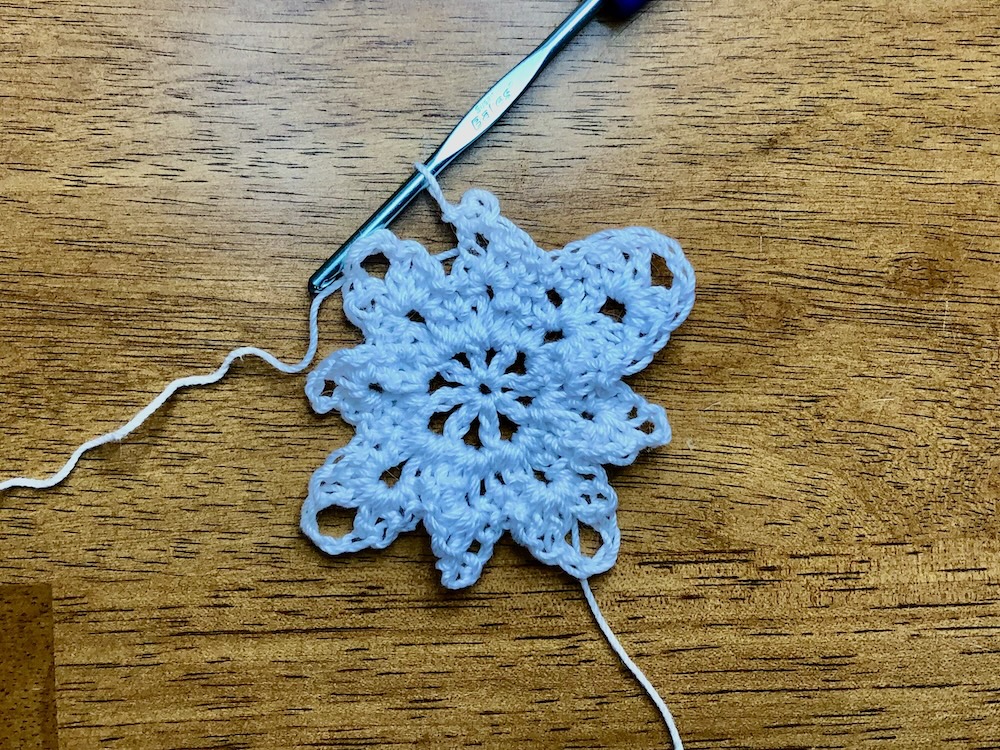
Skip one stitch, single crochet in the next 2 stitches, skip one stitch then single crochet in the next two stitches to bring you to the next chain 3 space like above. In the next chain 3 space, work 2 single crochet stitches, chain 2 and 2 more single crochet stitches.
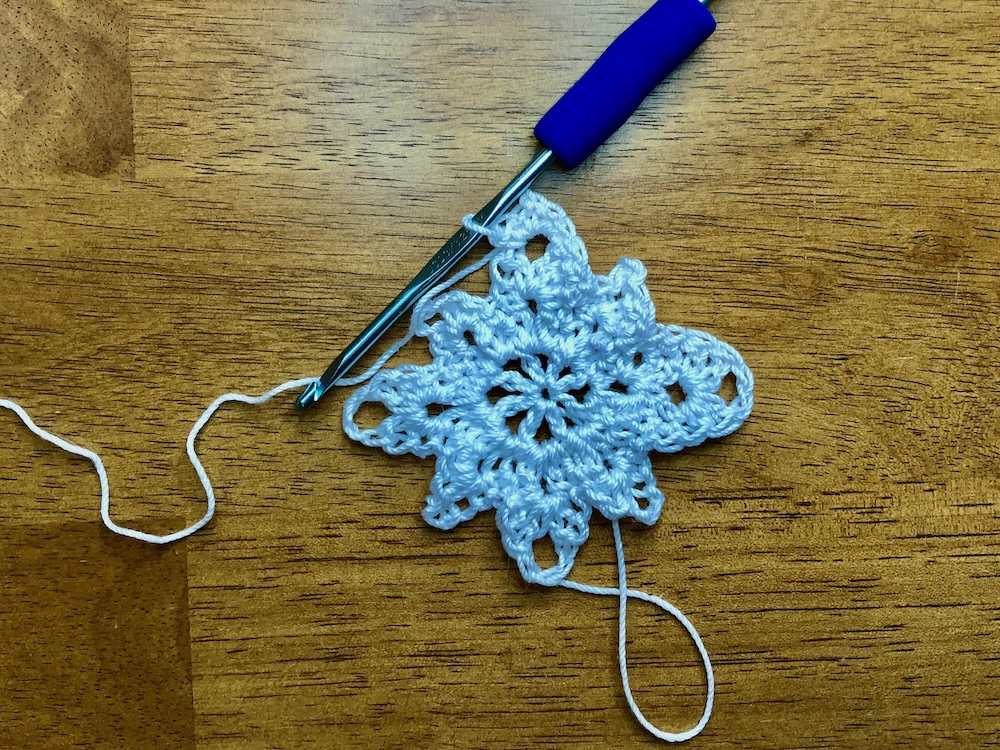
Continuing like above, skip one stitch, single crochet in the next two stitches, skip one stitch and single crochet in the next two stitches to get to the next chain 3 space. In this space, we will repeat the pattern for the second chain 3 space: slip stitch, chain 2, slip stitch. Then skip a stitch, single crochet in the next two stitches, skip a stitch and single crochet in the next two stitches. This brings you to the bottom point of the star!
The bottom point is the longest point, so we will be using a couple of long stitches as we work this point:
- treble crochet – yarn over twice, insert your hook and pull up a loop, yarn over and pull through 2 loops 3 times
- double treble crochet – yarn over three times, insert your hook and pull up a loop, yarn over and pull through 2 loops 4 times.
In the chain 3 space, work 1 half double crochet, 1 double crochet, 1 treble crochet, 1 double treble crochet, chain 3, 1 double treble crochet, 1 treble crochet, 1 double crochet and 1 half double crochet.
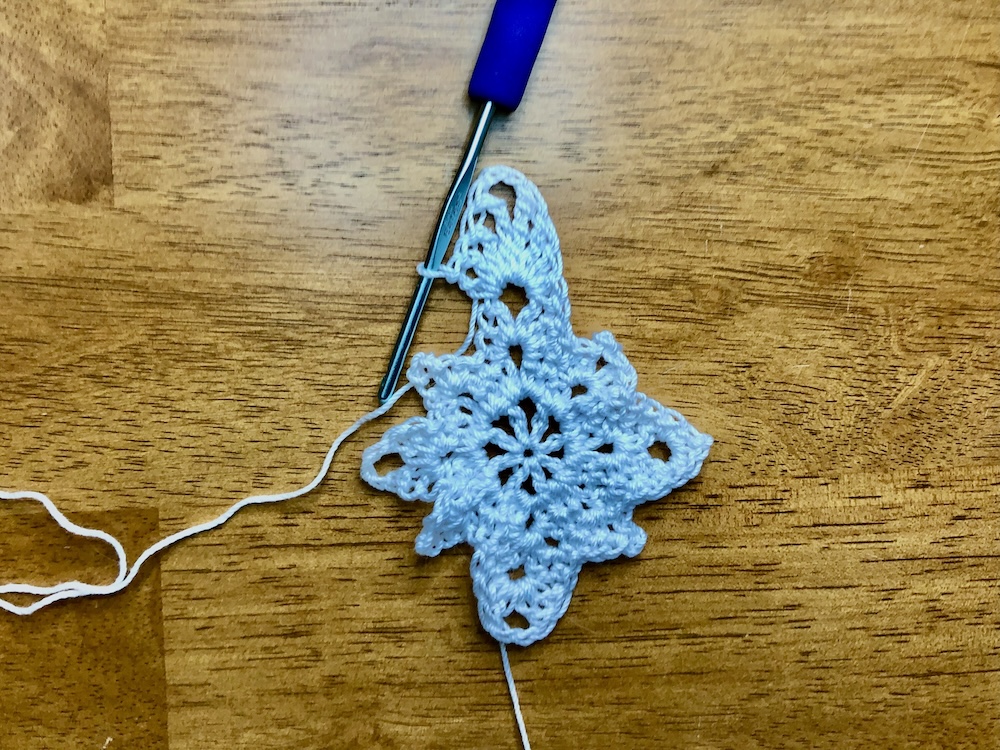
Don’t worry if your stitches look a little wonky here – they will straighten out after blocking. We used a chain 3 for this point to give a little more space for those double treble crochet stitches.
To complete the star, we will work up the other side just like we did on the first side.
Skip one stitch, single crochet in the next two stitches, skip one stitch and single crochet in the next two stitches to get to the next chain 3 space. In this space, work 1 slip stitch, chain 2 and 1 more slip stitch.
Skip one stitch, single crochet in the next two stitches, skip one stitch and single crochet in the next two stitches to get to the next chain 3 space. In this space, work 2 single crochets, chain 2 and 2 more single crochets.
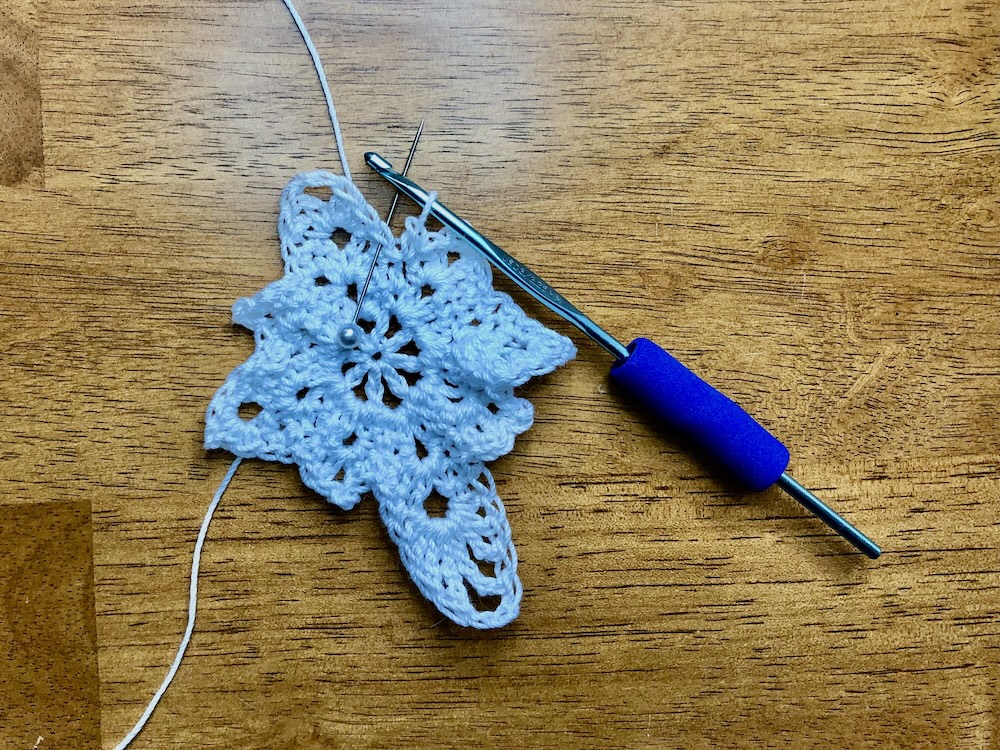
Skip one stitch, single crochet in the next two stitches, skip one stitch and single crochet in the next two stitches to get to the last chain 3 space. In this space, work 1 slip stitch, chain 2 and 1 more slip stitch. Skip one stitch and single crochet in the next 2 stitches. To finish off, skip one stitch then slip stitch in the next stitch to join the round. The pin in the photo below shows the location for the final slip stitch.
Finishing Touches
To finish the star, cut your thread and pull through the final slip stitch, weave in your ends and you are finished with the crocheting part! You will need to block your ornament so it hangs nicely on the tree. I am using a mixture of water and glue, but you can use a liquid starch or other blocking medium. Just make sure you have rust proof pins so you don’t get spots on your new ornaments. To block, thoroughly wet the ornament with the blocking solution, then pin each point. Stretch slightly to create nice points, but don’t stretch so much that you pull the star out of shape. Leave the ornament to dry completely before removing the pins.
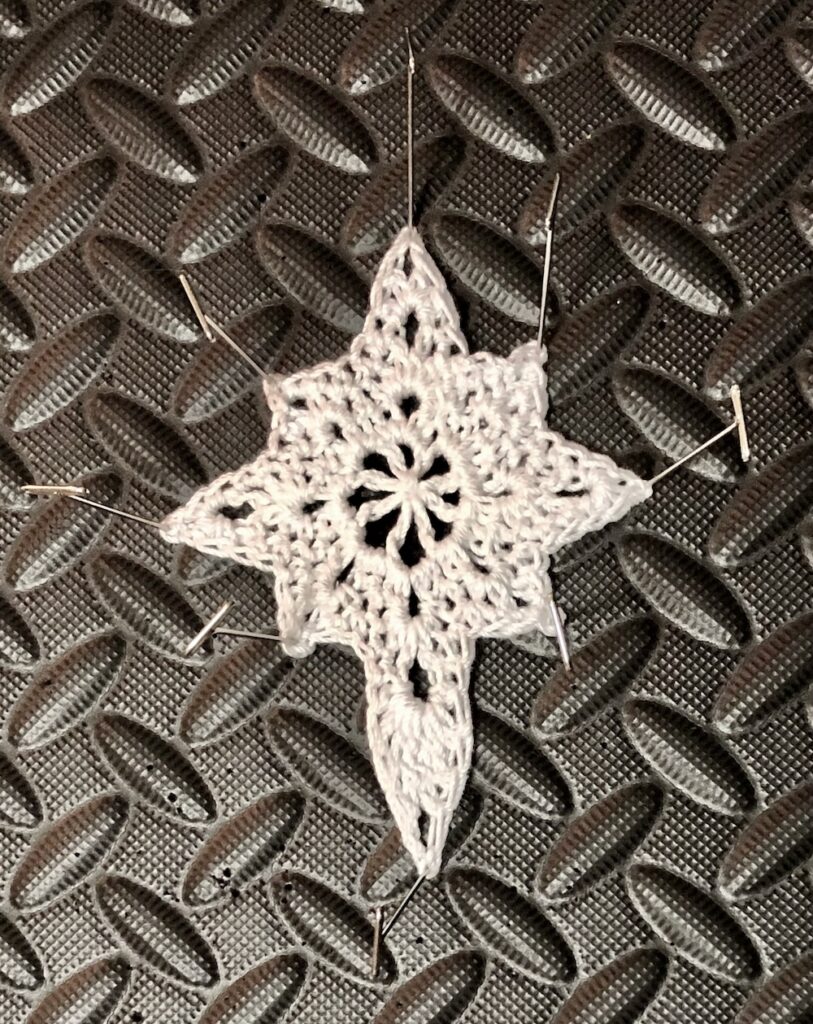
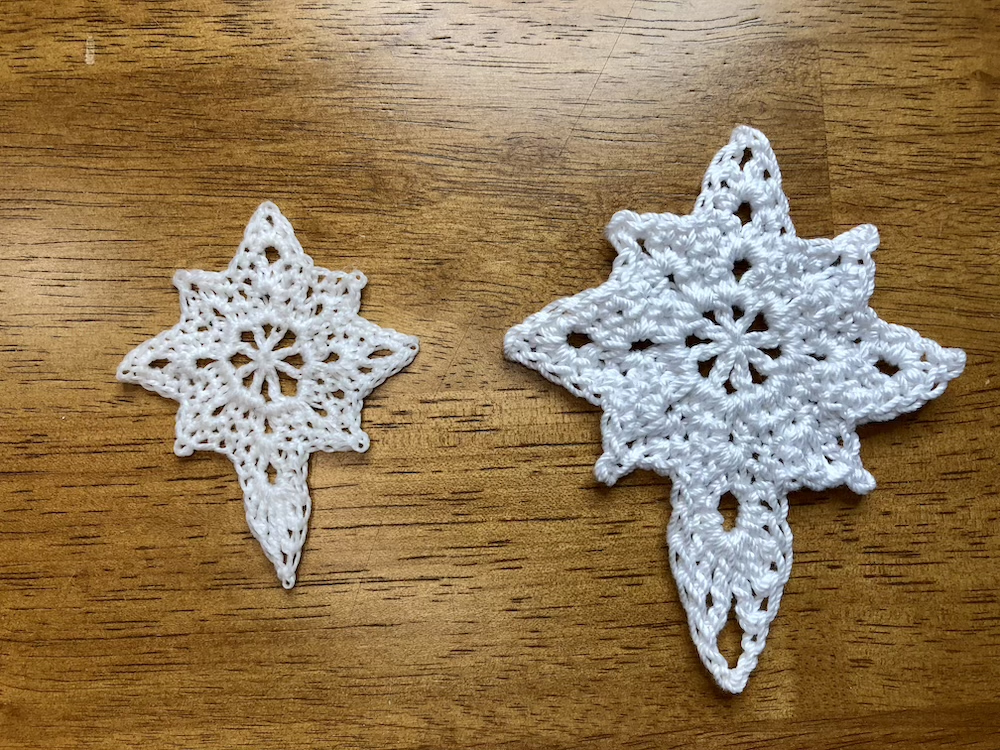
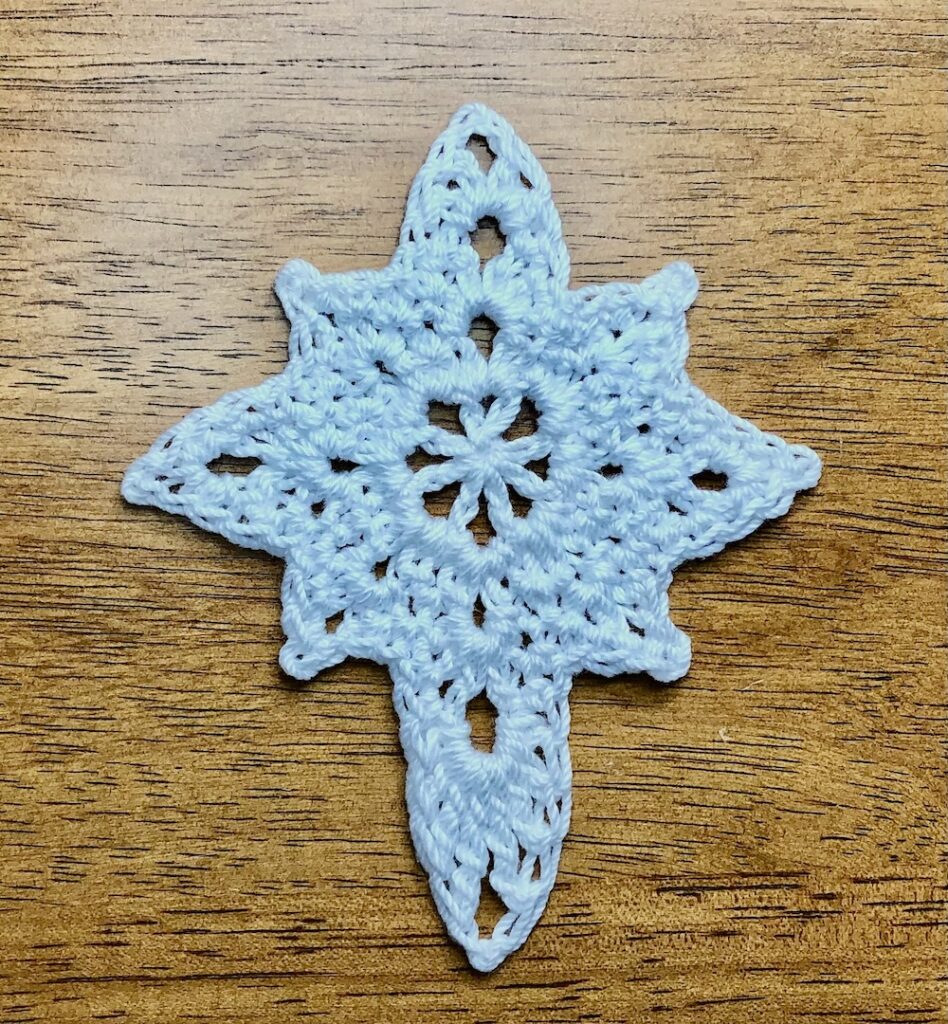
Once it is dry, remove the pins and attach your hangar of choice! The finished star should measure about 3.5 inches across and 4.5 inches long. You will be able to get at least 13 stars out of a 150 yard ball of Aunt Lydia’s Fashion 3.
If you want a smaller star, you can make the same pattern using number 10 cotton crochet thread and a 1.75mm hook. The finished star will be approximately 2.25 inches across and 3 inches long.
I hope you enjoy your crocheted Christmas Star Ornament! Be sure to tag @sugarspiceandyarn in any photos you share on social media so I can see your beautiful creations!
Pin it for later!
Prefer video instructions? Check out my YouTube tutorials!
Looking for another project? Make sure you check out my Patterns Page or my Quick and Easy Valentines Hearts!

Buy me some Yarn?
If you are enjoying the content I've created and would like to support with a tip, you've found the right place. Any amount is greatly appreciated!

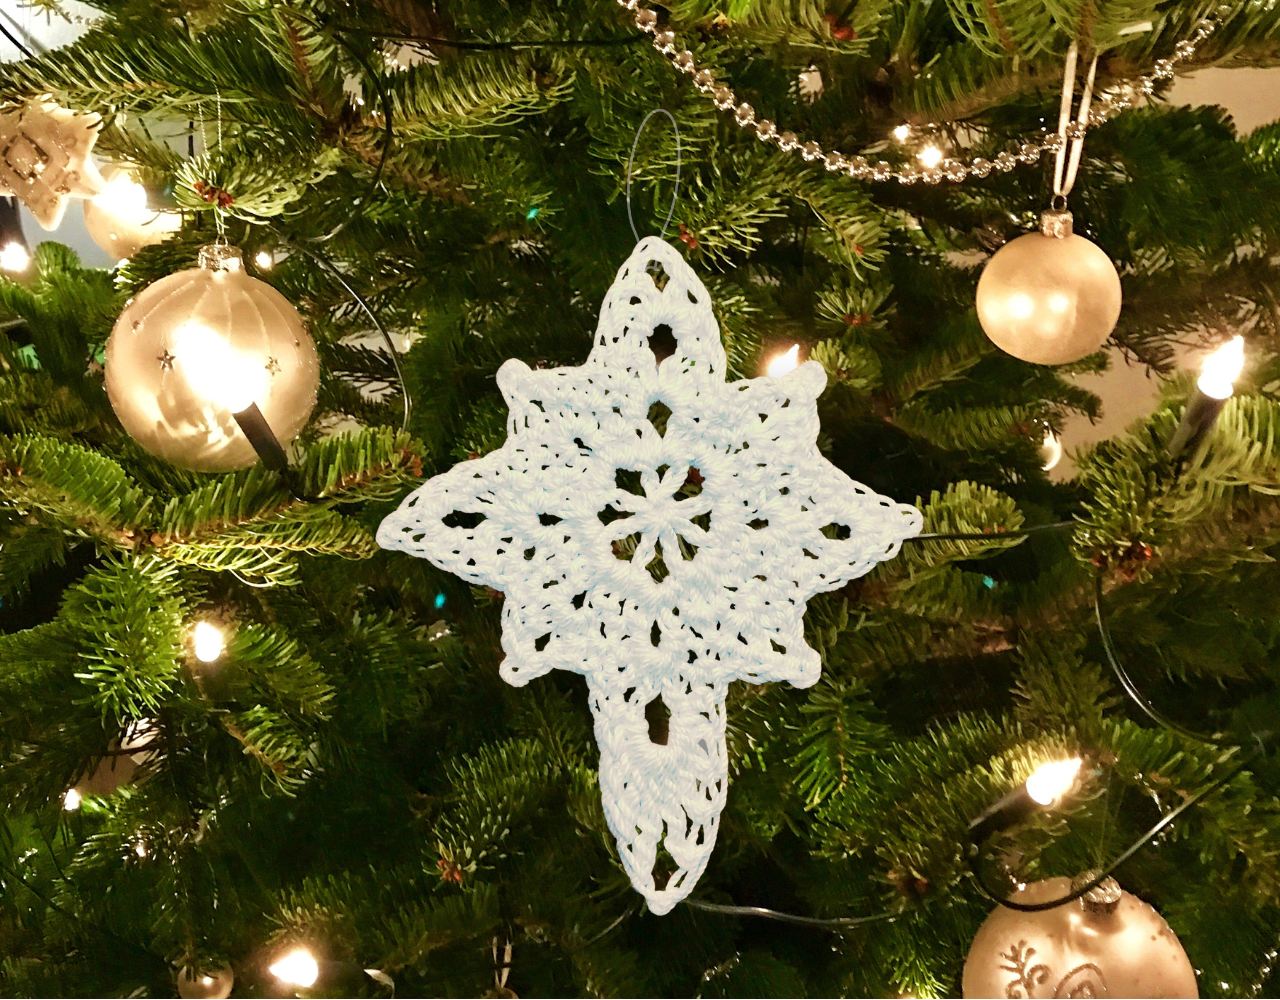

I would like to make a much larger star- approximately 25″ x 40″ with worsted weight yarn. How would you suggest modifying this pattern?
Hi Elizabeth! In order to make that large of a star, you would need to add several rounds with increases built in to make sure it does not curl in on itself. I also don’t know how well worsted weight yarn would work for this pattern. I have a feeling that with a heavier yarn, you will lose the detail in the points of the star. You can certainly give it a try with worsted weight yarn, just adjust the hook size to match the yarn you are using. If you give it a try, I would love to see some pictures!
Thank you for your input. I will give it a try and see what happens!
You’re welcome! I would love to hear how it turns out!